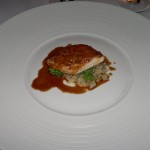
Chicken Madeira

Coming off Memorial Day weekend, the last thing–the VERY LAST THING–I need is more calorie laden food. Umm, not. But a small part of me was craving, y’all. I got to cravin’ Cheesecake Factory’s Chicken Madeira. So I set about to getting the recipe. And there are lots of them, both for Cheesecake Factory’s version as well as for the sauce itself. Here is my not so off-the-cuff rendition of this fav.

Chicken Madeira

Ingredients:

4-6 pieces of chicken, pounded thin (I use a mix of breasts and thighs)
3 pieces of garlic, minced
1-2 medium onions, diced
2-3 cups of mushrooms, sliced
2-3 tbsps butter
3 cups madeira wine
1 cup beef broth ( I use a cup of water and Knorr’s beef jelly thing-a-ma-bobs)
2-3 tbsp flour
mozzarella slices
1 tsp thyme
salt
pepper

Instructions:

1. Preheat oven to 350. Heat skillet over medium-high heat. Season chicken with salt and pepper. Fry each piece in oil until golden brown on both sides. Place in oven casserole dish as they finish cooking.

2. Add more oil to the skillet. Add onions and cook for a few minutes. Add garlic and cook for another minute or two. Add mushrooms and cook for a few minutes.  Add flour and cook until it pastes. Add thyme and salt and pepper. Cook for a minute. Add wine and broth and cook until thick and reduced in half.

3. Place mozzarella slices on each piece of chicken. When sauce if thick and reduced in half, pour over chicken. Bake until cheese bubbles, or longer.

The Cheesecake Factory serves their chicken with asparagus and a heaping mound of mashed potatoes. I can attest that this is an excellent accompaniment choice for this dish. However, I like mine over an argula salad instead of asparagus, although I do really, really like the mashed potatoes to sop up the delicious madeira gravy. For those of you doing the low carb thing, roasted vegetables would be cool instead of the mashed potatoes as would roasted and riced cauliflower. For the Argula salad, I make a lemon/white wine vinaigrette right before I toss the greens and serve it under the chicken to help the argula wilt slightly.

Vinaigrette

1 tbsp dijon mustard
2-3 tbsp lemon juice
1-2 tbsp white wine vinegar
1/2 cup olive oil salt pepper parmesan cheese
– put mustard, juice and wine in a bowl. Whisk together. Keep whisking while adding olive oil. Add salt and pepper to taste being sure to under season for salt since the parmesan cheese is salty.  Stir in parmesan cheese. Toss in argula.

I fell in love with “rocket” as argula is called on the continent many moons ago. It is served quite often in many European countries. Plus, it just taste like summer. In any event, slice up some limes and pop open a Corona and eat the chicken. It is delish. Add in some rocket, and this flavor combo is out of this world. 😉

Risi e Bisi

Peas and Rice. Simple. Perfect. I learned about this dish when I went to Venice one summer. It was the summer that I got a wild hair up my ass and decided to leave everything behind for a month and kick around Europe. Granted, I should’ve done this as a young woman and not the… ahem… older woman I was when I went. I had a blast anyway.

It was the first vacation I’d ever taken alone. It was also the longest vacation I’d ever taken. And I included a 9 day hut-to-hut hiking trip through the Swiss Alps. I spent the next twenty days tooling around the Italian countryside by train. I got comfortable in my own skin on that trip. Alone. By myself in a foreign country or two. I met up with some girlfriends in Rome, but other than that… it was all me all the time.

I scheduled a couple of things before I left on my trip. One of those was a cooking class in Venice. And in that cooking class, I learned to make risi e bisi old school from a gracious native hostess. I’ve never forgotten her or the dish.

The recipe uses a combination of broth and wine. Many use just broth. The ones who view risi e bisi as the food to prepare as a herald of spring will find fresh peas and use the water from the cooking peas as the broth to make risi e bisi. I am not so exuberant in my greeting of Spring. 😉

Risi e Bisi

14-ounce bag frozen peas (a full pound is fine, too)
4 tablespoons butter
2 tablespoons onion, chopped
4 cups chicken stock, or 2 cups stock/2 cups white wine, or 4 cups pea broth
1 cup Arborio rice
1/2 cup Parmesan, freshly grated

In a soup pot or dutch oven, melt the butter over medium heat. Add the onion and sauté until it becomes lightly golden. In a separate pot, heat the stock until it reaches a simmer.

Easy Method:

Once the onion is ready, add 3 cups of the simmering stock, the rice, the bag of frozen peas, and a good pinch of salt. Cover the pot and and cook at a low boil for about 20 minutes, stirring occasionally, until the rice is just tender. If the soup is too thick, thin it slightly with the remaining stock; it should be thick but not porridge. When the rice is ready, add the grated Parmesan and taste for salt. Serve.

More Difficult Method:

Once onions are translucent, add rice to pot. Cook for a few minutes until rice starts absorbing the oil. Add in half a cup of liquid and cook while stirring. Cook down until almost all liquid is absorbed, add another half up of liquid. Cook while stirring until most of the liquid has been absorbed. Continue until all liquid has been cooked. In the last half cup of liquid, add peas. Taste and adjust seasoning. Don’t over salt if adding grated Parm as the cheese will add salt naturally.

* you can add diced pancetta or bacon to the pot with the onions to give it a different flavor or you can add crispy bacon bits at the end along with crunchy fried onions as a garnish. But this is a simple dish created to showcase new Spring peas.


Saturday Snippet: More Night Blind

NIGHT BLIND is available for immediate download over at the Totally Bound website. Click on the pic and it’ll take you right on over there. General release will be April 25, 2014. But why wait until then? Sheesh… instant gratification, peeps. ‘Nuff said. 😉
nightblind_800_2

Preorder: 14th March 2014 (preorder through TEB website)
Prerelease: 28th March 2014 (available to buy on TEB website)
General Release: 25th April 2014 (available everywhere)

BLURB:

As Lucien, Rory, and Ellie navigate the intricacies of a full triad, including one man new to man-love, they also have to seek and destroy the source of the sickness afflicting witches.

Every Vampire Lord needs a shifter bodyguard. Rory has been Lucien’s for a while now. And although Rory’s been protecting Lucien’s body, Lucien has been just plain lusting after Rory. Unfortunately, Rory’s been rebuffing Lucien’s advances. That is, until Ellie comes along with her witchy bad self. The Witch Council is sending her to Dallas in her capacity as Enforcer. And to make matters more interesting, they’re also sending Lucien and Rory.

Ellie’s mission is to find and destroy the source of the witch sickness. Along the way, she uncovers Rory’s reason for hesitating in accepting Lucien’s advances. Rory’s never been with a man before. As a result, Rory and his wolf are confused when Lucien comes on to him. But with Ellie’s help, Rory’s not confused anymore. Now, what happens in Dallas… Well, it’s not going to stay in Dallas.

As Lucien, Rory, and Ellie navigate the intricacies of a full triad, they also have to navigate the treacherous home of the Dallas Vampire Lord during the winter solstice. Because something is rotten. And Ellie’s pretty sure it’s the Dallas Vampire Lord.


Warning… maybe: One shifter new to manlove, one witch new to threesomes, and one vampire who’s been there and done that… a thousand times. At least. They’re all new to each other. Add in crazed bad guys unleashing diseases of mass destruction, and well… what happens in Dallas, it’s not gonna stay in Dallas. Light m/m action, some anal and LOTS of hot menage.

EXCERPT:

“Get the fuck out of my way,” she snarled at the bloodsucking asshole who had stepped in her path.

Christ, she hadn’t signed on for this. She needed to find who she was looking for then get the fuck out of this pit. Before she did something stupid. Like taking out a bitch not on her kill list.

Blood dens were a crap shoot at the best of times. Some were all about the sex. Drawing humans with the lure of the best sex they would ever have in exchange for a little blood during the act. In well-run dens, most of the humans were left alive, and mostly intact. This one was all about exploitation, however. So not a good time for her. She wouldn’t be surprised if some of the humans here, who had signed the liability waiver, didn’t end up dead in this joint.

What flowed through her veins called to vampires. Her blood was sweet and it smelled that way. Almost like catnip for bloodsuckers. But more than that, hers was strong. Given the choice, most of the vamps in the den would have opened her vein and drained her dry—with or without a liability waiver.

Initially, it was her sword holding them back. As well it should. She wasn’t carrying it for looks. It was for killing. And everyone who saw her and saw it, knew it. In a race of killers, her blade was well respected.

Most of the vamps, even in the throes of blood glut, got out of her way. Self-preservation was a miraculous thing. As high as they were, they still knew death’s scent. Permanent death, not the kind that made vampires. The kind that sent them over to the other side. For good.

She felt the power of an older undead before she saw him. Not too strong, but still old. There was enough power in the approaching blood drinker to be the one to run this place. The power signature pressed closer and closer.

“Morrie,” she greeted him, even though she couldn’t see him.

He was approaching her from behind. It was done on purpose. To check her blind spot. Now he knew. They all did.

“Lady,” he gave her the respect of her title. Smart man.

Even if his obeisance came after he had felt how much more powerful she was, she didn’t comment on the hesitation in his greeting. Mostly it was the magic in her sword. But she wasn’t without natural power. She was a witch, after all. Her goddess’s arm of justice. Maybe not as strong as Ellie. But Ellie’s talent lay in healing. Hers lay in enforcing the laws and hunting down those who broke them. Witch rogues, vampire rogues, shape-shifter rogues, elven rogues. All of them. If they broke the law and stepped beyond redemption, she hunted them down and killed them.

She was on the hunt tonight.

“There’s a diseased vamp in here, Morrie. Find him. Bring him to me and I’ll leave the place standing,” she ordered.

“Don’t know what you’re talking ‘bout, Enforcer,” Morrie shot back.

“Morrie, I’ve been chasing this bastard all over town. I followed him here. I can feel him in here. Find him, bring him to me before I tear this fucking place apart trying to find him myself.” She knew he was lying. He knew she knew he was lying.

Time to find out why he was lying later. Right now, she had other things to do.

Morrie looked set to argue with her again. She let some of her magic out. Electricity started sparking from her body. Morrie’s eyes got big. He took a step back, throwing up his hands in supplication.

“If you don’t bring him to me immediately, I will burn this den down,” she said. Her sight developed a slight film as her power filled her. “You make me burn this place down, I’ll do it with everyone inside. Then it’ll be known that you were harboring a rogue and refused to give him to me. You won’t be well liked, Morrie. I won’t even have to hunt you down myself. Your lord will do it for me.”

“Yes, Lady.” Morrie scurried off to do her bidding. “I shall endeavor to find the one you seek immediately.”

nightblind_banner

Scones, Scones and more Scones

Keeping with the Irish theme, I thought I’d share a few scone recipes. The first one is an interpretation of an Irish scone. The second recipe is the one I use most. Last, but not least, is a paleo almond flour variation. Try one or try them all. I like ’em all enough NOT to make them too often. Ummm, cause they go straight to my ass. 😉


“Real” Irish Scones

By: Emily

~makes about 8-10 small scones

2 cups unbleached all-purpose flour
1 tablespoon baking powder
2 teaspoons granulated sugar
1 teaspoon fine salt
3 tablespoons unsalted butter, softened to room temperature
1/2 – 3/4 cup milk, cream, or a combination

Preheat oven to 350° F. Place a baking sheet pan lined with parchment paper or a Silpat in the oven.

Sift together the flour, baking powder, sugar and salt into a mixing bowl. Use your fingertips to work the butter into the dry ingredients until the mixture just holds together.

Working the mixture as little as possible, add 1/2 cup milk and mix until it forms into a soft, slightly sticky ball. Add more milk if needed to reach desired consistency.

Place the dough on a very lightly floured work surface. Using a floured rolling pin, gently roll the dough to a 1-inch thick slab. Dip a 1-2-inch biscuit cutter in flour and cut out the individual scones, or slice the dough with a knife of the blade of a bench scraper.

Remove baking tray from the oven and arrange the scones on it. Bake 8 minutes, turn over, and bake another 4 minutes or until just barely brown.

Serve with butter, preserves, and freshly whipped cream.

If you have leftovers, reheat at 350°F for 2-3 minutes or until warmed through, or freeze by wrapping completely cooled scones in plastic wrap, then placing in a zippered bag or freezer-safe storage container. To reheat, thaw at room temperature in the plastic wrap, then unwrap and re-heat as above at 350° F.

Variations

• Herb – add a few tablespoons chopped fresh thyme, rosemary, chives or sage to the dry mixture.
• Cheese – add 1/2 cup grated cheddar or Parmesan cheese to the dry mixture. Brush the tops with beaten egg or cream and sprinkle with more grated cheese.
• Currant – add 1/2 cup currants (or raisins) to the dry mixture.
• Chocolate – increase the sugar to 2 tablespoons, add 4 ounces chopped semi-sweet or bittersweet chocolate, and sprinkle each with a pinch raw sugar before baking.


Dreamy Cream Scones

2 cups (10 ounces) unbleached all-purpose flour, preferably a low-protein brand such as Gold Medal or Pillsbury
1 tablespoon baking powder
3 tablespoons sugar
1/2 teaspoon salt
5 tablespoons chilled, unsalted butter, cut into 1/4-inch cubes
1/2 cup currants (I used dried cranberries, and chopped them into smaller bits)
1 cup heavy cream

1. Adjust oven rack to middle position and heat oven to 425°F.

2. Place flour, baking powder, sugar and salt in large bowl or work bowl of food processor fitted with steel blade. Whisk together or pulse six times.

3. If making by hand, use two knives, a pastry blender or your fingertips and quickly cut in butter until mixture resembles coarse meal, with a few slightly larger butter lumps. Stir in currants. If using food processor, remove cover and distribute butter evenly over dry ingredients. Cover and pulse 12 times, each pulse lasting 1 second. Add currants and pulse one more time. Transfer dough to large bowl.

4. Stir in heavy cream with a rubber spatula or fork until dough begins to form, about 30 seconds.

5. Transfer dough and all dry, floury bits to countertop and knead dough by hand just until it comes together into a rough, sticky ball, 5 to 10 seconds. Form scones by either a) pressing the dough into an 8-inch cake pan, then turning the dough out onto a lightly floured work surface, cutting the dough into 8 wedges with either a knife or bench scraper  or b) patting the dough onto a lightly floured work surface into a 3/4-inch thick circle, cutting pieces with a biscuit cutter, and pressing remaining scraps back into another piece (what I did) and cutting until dough has been used up. (Be warned if you use this latter method, the scones that are made from the remaining scraps will be much lumpier and less pretty, but taste fine. As in, I understand why they suggested the first method.)

6. Place rounds or wedges on ungreased baking sheet and bake until scone tops are light brown, 12 to 15 minutes. Cool on wire rack for at least 10 minutes. Serve warm or at room temperature.

*sometimes I add strawberries and cream cheese


Paleo Almond Scones

2 cups blanched almond flour
⅓ cup arrowroot flour
½ teaspoon sea salt
2 teaspoons baking powder
2 Tablespoons pure maple syrup
½ teaspoon pure almond extract
¼ teaspoon pure vanilla extract
1 large egg
¼ cup melted organic coconut oil
¼ cup raw, slivered almond pieces

Instructions

Preheat oven to 350F. Line a baking sheet with a Silpat or parchment paper. Combine almond flour, arrowroot flour, salt and baking powder in a large mixing bowl. If there are any lumps in the almond flour, use a fork to break them up.

In the bowl of a stand mixer or another large mixing bowl, combine maple syrup, almond and vanilla extract with the egg.

Turn on mixer and slowly pour in melted coconut oil until well combined. (If using a hand mixer, begin beating mixture and slowly pour in melted coconut oil.)

Pour the liquid mixture into the flour and mix until well combined.

Finally, stir in the slivered almond pieces until mixed throughout. Use your hands to form the dough into a ball. Place on baking sheet and gently press down to flatten.

Cut into eight triangles and bake for 20 to 25 minutes (I had to bake until 25 minutes to get nice brown edges) or until edges are nice and brown but not burnt. Remove and cool completely on a wire cooling rack.


Beef Stew with Guinness

St. Patrick’s Day is around the corner. So I thought that in honor of the Irish… I’d share some recipes that are Irish-y in nature. lol The beef stew below can be made with any food beer, but why not go for the Guinness? The more flavorful the beer, the deeper the underlying notes to the stew. I also do not add potato cubes to the stew either. I prefer to mash the potatoes and then ladle the stew on top of a mound of fluffy white goodness.

Irish Beef and Guinness Stew

2 pounds beef chuck or sirloin, cut into 1-inch chunks (lamb is okay, too)
1/4 cup vegetable oil
2 tablespoons flour
1/2 teaspoon salt
1/4 teaspoon black pepper
1/4 teaspoon cayenne pepper
1/4 teaspoon paprika- I use smoked
1 bay leaf
1 1/2 teaspoons Dijon mustard
1 tablespoon Worcestershire sauce
2 cloves garlic, chopped
2 large onions, chopped
2 tablespoons tomato paste
2 1/2 cups Guinness stout (any dark beer is okay)
1 cup beef stock
4 large carrots, chopped
4 celery ribs, chopped
1 sprig fresh thyme
fresh parsley for garnish


Place beef cubes in a bowl and massage on 1 tablespoon of the oil. In another bowl, stir together the flour, salt, black pepper, cayenne pepper and paprika. Dredge beef in this flour mixture until every side of all the beef pieces are coated and there is no loose flour in the bowl.

Heat remaining oil in a large heavy pot or Dutch oven over medium-high heat. Cook the beef in a single layer. If, due to the size of your pot, you need to do this in batches, take the time. The beef will steam instead of brown if you pile it all on top of itself. Browning it properly is the key to a good stew. After all the beef is browned, make sure it is all in the pot (if you did it in batches) and add the garlic and onions. Stir in for a minute or two (without letting the garlic brown). Add tomato paste, beer and beef broth and thyme. Add carrots, bay leaf, mustard and Worcestershire. Cover and cook for 3 1/2-4 hours at 325 degrees F until beef is tender. During second half of cooking check liquid level a couple times and add a little more beer or broth if too much has evaporated. If you like, you can make mashed potatoes ahead of time, place in a buttered casserole dish, cover with foil and keep warm in the oven with the stew during the last 20 minutes of it’s cooking.

Right before serving, remove the bay leaf, taste the gravy and add more salt and pepper, if needed.

Place a generous dollop of mashed potatoes or champ in a bowl, ladle stew over and sprinkle with parsley.


Crock-Pot method:

Brown beef as described above, then deglaze pan with beer and broth. Add all ingredients to your crock pot. Cook on low for 8-10 hours. Towards end of cooking check liquid level. Add more if needed.


Happy Valentine’s Day 2014

It’s the day of love– for love and lovers.

To that end, I found a compilation of 80s love songs. Yeah, I know it probably dates me… but no one did or does love songs like those songster of yesteryear. So listen to the music as you finish out the post and let the notes carry you to a far, far better place. 😉 Journey, Foreigner and more.

Enjoy!

Nothing says Valentine’s Day like candy and flowers. Bet you didn’t know you could combine those two things. I’ve put a recipe for candied roses down below. But don’t limit yourself to roses. There are lots of edible flowers and a veritable rainbow can be had depending on which bloom you choose.

Sugared Rose Petals and Rose Sugar

Roses first came to the West from Persia in 1240 by way of French Crusaders. The first known cultivated rose is Rosa gallica var. officinalis, also known as the apothecary rose. I use the petals for various things: potpourri, bath fizzies, bath salts, rose water, and cooking. The petals are lovely in salads, but what I really like to do is candy them and make rose sugar.

Sugared Rose Petal Ingredients and Supplies

-pasteurized egg white beaten with a little water (if you’re concerned about using raw eggs, -you can use simple syrup or prepared meringue powder)
-Granulated sugar
-Fragrant rose petals, well rinsed and patted dry
-A small watercolor brush

Rose Sugar Ingredients and Supplies

-Fragrant organic rose petals, well rinsed and patted dry
-Sugar
-A clean, pretty jar, such as a Ball Kilner rubber-sealed jar


To Make Sugared Rose Petals

1. Make sure your rose petals are organic (pesticide free). Remove the bottom white tip of each rose petal and discard; the tips have a bitter flavor. Assemble your supplies.
2. Paint both sides of each rose petal with the egg wash, simple syrup, or prepared meringue powder.
3. Sprinkle the prepared petals in sugar on both sides
4. Set on a piece of parchment paper or wax paper and let dry overnight. If you use simple syrup, the petals won’t hold their shape as well as they do with the egg wash
5. Use your candied petals as edible decorations for cakes, puddings, candies, cookies, and pastries. If you don’t plan to use them right away, store sugared petals in a freezer.


To Make Rose Sugar

1. Make sure your rose petals are organic (pesticide free). Remove the bottom white tip of each rose petal and discard. Sprinkle sugar on the bottom of the jar and sprinkle a layer of rose petals over it. Layer more sugar and rose petals until the jar is filled. Store in a cool, dark place (such as your pantry or cupboard or “close roome”) for several weeks. When you open up the jar you’ll be met with a rosy perfume. You can remove the petals before using.
2. Use your Rose Sugar to flavor pastries, cookies, and confections or sprinkled over their tops. Stir the rose-infused sugar into tea, lemonade, or anything you’d like to give a slight rosy flavor. It’s particularly nice sprinkled on top of scones and shortbread.

***

As you listen to love songs and eat delicious things, remember… today is about love. And love is about giving to others. So don’t forget to spread and share the love. Not just today, but everyday.

Chinese New Year 2014

The Chinese New Year is on January 31st this year. It’s the year of the Horse. Chinese astrology is kinda fun to look up and read about. It is vastly older than most Western astrological systems.

In honor of the Chinese New Year (yes, other Asian countries also celebrate this New Year even though it’s called the Chinese one. lol), I thought I’d share a fortune cookie recipe. Red is the lucky color so make the little fortunes inside red ink on white paper or red paper with a dark or metallic ink.
Enjoy!

Fortune Cookie

3 egg whites
3/4 cup white sugar
1/2 cup butter, melted and cooled
1/4 teaspoon vanilla extract
1/4 teaspoon almond extract
1 cup all-purpose flour
2 tablespoons water

Directions

  1. Preheat the oven to 375 degrees F (190 degrees C). Grease cookie sheets, or line with parchment paper. Have fortunes ready to go on small strips of paper.
  2. In a large glass or metal bowl, whip egg whites and sugar on high speed of an electric mixer until frothy, about 2 minutes. Reduce speed to low, and stir in melted butter, vanilla, almond extract, water and flour one at a time, mixing well after each. Consistency should resemble pancake batter. Spoon the batter into 3 inch circles on the prepared baking sheets. Leave room between for spreading.
  3. Bake for 5 to 7 minutes in the preheated oven, or until the edges begin to brown slightly. Quickly remove one at a time, place a message in the center, and fold in half. Fold the ends of the half together into a horse shoe shape. If they spring open, place them in a muffin tin to cool until set.

* try lemon extract instead of vanilla or a different taste.
** don’t overbake the cookies or they won’t be flexible enough to mold.
*** they are also good dipped in chocolate.

Happy Thanksgiving 2013

Happy Turkey day y’all. Gobble, gobble. lol I actually like Thanksgiving as far as holidays go. I like that it’s about food and family and getting together. In my family, at dinner, we go around the table and tell about the one thing we are the most grateful for that occurred in the last year. Not all the things that make us give thanks or a few of them. Just one. It makes us focus and keeps the momentum going so everyone gets a chance before the dinner is over. It’s awesome.

So many of our holidays have turned into three ring circuses. I like hanging out with friends and family, watching football and generally just being with the people who love us and we love back. Then if you’re lucky, you made plans to go gorilla shopping the next morning, complete with infiltration plans and an exit strategy, with those very same people. Cause for Black Friday shopping, you NEED a posse. People who will have your back and not leave a man behind. But they also have to have sharp eyes to look for bargains as well as coordinate color combinations. So really, you want a variety of family members to go with you to cover your back. Yes, it has gotten that grime out there. Little blue haired old ladies will cut a bitch to get to the blouse on sale. Seriously.

I also vary my menu a little every year. Yes, I do turkey and ham. And most of the sides are perennial favorites. But this year instead of a chocolate pecan pie, we are having a dark chocolate mousse. I’ve decided to forgo candied yams in favor of the simpler baked sweet potatoes. And so on. Here’s my Thanksgiving menu:

brined, dry rubbed turkey
ham
mashed potatoes with roasted garlic and herbs
sweet potatoes
green bean casserole
broccoli and cauliflower in a cheddar cheese sauce
stuffing with chestnuts, gruyere and bacon bits
turkey gravy
pumpkin pie
chocolate mousse
cranberry sauce

This menu is for 4 people. I add more sides and maybe an appetizer sampler if I have guests arriving. But for the small, nuclear family thing? The above menu has been honed from years of tweaking to find the perfect balance for my family. Yours may vary.

Now the best part of Thanksgiving isn’t the main menu, although that is pretty great. Nope, the best part is the left-overs. I like messing around with different recipes to use the turkey as much as possible. I even use the turkey carcass as a soup base. But that’ll come later. And if you serve turkey for Christmas, then some of the leftover recipes will stand you in good stead.

Soups, Soups and More Soups

Thanksgiving is right around the corner. The weather folks keep making dire predictions of cold, snow, rain and sometimes all of the above. I don’t know about you, but when the outside is crappy, I like the inside to have soup. Lots of soup to warm a person up. I try to keep a pot of something on the stove at all times. I picked the following three soups because I LOVE them. I also picked them because they are great cold-weather soups. Adding a slight international flare because they all originated in different countries.

Simple ingredients. Melding together to make something great. There is a lot of speculation that the first meals cooked on fire were not just meat shish kebabs, but also one pot meals. Can’t think of a better, simpler one pot meal our ancestors could have stumbled up other than soup. So it is very possible that soups have been eaten by humans and humanoids for as long as we’ve had fire. It’s something to think about.

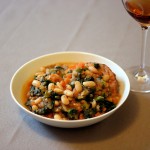
Tuscan Ribollita

– makes 4 servings

By: Roger

2 tablespoons olive oil plus extra for drizzling on top
1 large onion, chopped (1 ½ cups)
2 carrots, peeled and chopped (3/4 cup)
2 celery stalks, chopped (3/4 cup)
3 cloves garlic, thinly sliced
1/8-1/4 teaspoon red chili flakes (depending on how spicy you like it)
Salt and pepper
1 tablespoon tomato paste
1 bunch (about 10 oz) Tuscan kale, chopped (stems and ribs removed)
1 can (14.5 oz) diced tomatoes
4 cups low sodium vegetable or chicken stock or water
4-5 sprigs fresh thyme
1 bay leaf
1 parmesan rind*
1 can (15.5 oz) cannellini beans, drained and rinsed
2 cups cubed, firm bread such as ciabatta, whole wheat or multigrain loaf
2 tablespoons grated parmesan cheese

Heat the olive oil in a wide based pot or Dutch oven over medium heat. Add the onion, carrot, celery, garlic and chili flakes and cook 7-8 minutes, stirring occasionally, until partially softened. Season the vegetables with salt and pepper. Add the tomato paste and cook another 1-2 minutes until fragrant. Stir in the kale and cook until it starts to wilt, 3-4 minutes. Add the diced tomatoes, stock (or water), thyme, bay leaf and parmesan rind and raise the heat to bring to a simmer.

Meanwhile, pour about ¼ of the cannellini beans into a small bowl with a couple of tablespoons of the cooking liquid and mash them together with a fork to form a paste. Pour the paste along with the remaining whole beans into the soup and stir to combine. The mashed beans will help to thicken the soup as it cooks. Simmer the soup with the lid slightly ajar, about 25 minutes until the vegetables are softened but still al dente. Add the bread and simmer another 5-7 minutes, partially covered. The bread will start to dissolve into the soup and thicken it further.

Before serving, remove the thyme sprigs, bay leaf and parmesan rind. Adjust seasoning with salt and pepper. Spoon the ribollita into bowls and top with parmesan cheese and a drizzle of olive oil, if desired.

Note: The soup thickens as it sits and should not be very liquidy. If you prefer more liquid, feel free to add more water at the end.

*Adding the rind of a block of parmesan cheese is a traditional Italian method of adding flavor to soups. The next time you buy fresh parmesan cheese, you can reserve the rind which is normally discarded. Wrap it in plastic wrap and store in the freezer to use in dishes like this. If you don’t have one, just add some extra grated parmesan cheese as a topping at the end.


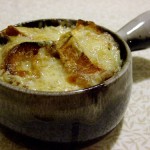
French Onion Soup

-makes 4 servings

By: dithie

1/2 stick butter (4 tablespoons)
1 tablespoon olive oil
8 cups thinly sliced onions (about 2-1/2 pounds)
1/2 teaspoon salt
1/2 teaspoon sugar
1 tablespoon flour
8 cups homemade beef stock, or good quality store bought stock
1/4 cup Cognac, or other good brandy
1 cup dry white wine
8 (1/2-inch) thick slices of French bread, toasted
3/4 pound coarsely grated Gruyere

Heat a heavy saucepan over moderate heat with the butter and oil. When the butter has melted, stir in the onions, cover, and cook slowly until tender and translucent, about 10 minutes. Blend in the salt and sugar, increase the heat to medium high, and let the onions brown, stirring frequently until they are a dark walnut color, 25 to 30 minutes.

Sprinkle the flour and cook slowly, stirring, for another 3 to 4 minutes. Remove from heat, let cool a moment, then whisk in 2 cups of hot stock. When well blended, bring to the simmer, adding the rest of the stock, Cognac, and wine. Cover loosely, and simmer very slowly 1 1/2 hours, adding a little water if the liquid reduces too much. Taste for seasoning

Divide the soup among 4 ovenproof bowls. Arrange toast on top of soup and sprinkle generously with grated cheese. Place bowls on a cookie sheet and place under a preheated broiler until cheese melts and forms a crust over the tops of the bowls. Serve immediately.


Spanish Sopa de Ajo

– makes 4 servings

About 6 cups of cubed French or Italian bread
1/4 cup extra virgin olive oil, plus more to drizzle on bread cubes
6-10 thinly sliced garlic cloves
2-3 oz ham diced
3 tsp paprika or to taste
6 cups chicken broth
4 large eggs
1/4 cup chopped Italian parsley
salt, pepper, cayenne to taste

In a large stock pot, eat olive oil. Add garlic and cook until lightly golden brown. using a slotted spoon, remove the garlic from the oil and set aside. In small batches, toast the bread adding more olive oil as needed.

Once all of the bread is toasted, take the pot off the heat and add the paprika, ham and stir to combine everything. **Do not burn the paprika or it will turn bitter.** Once it is well combined, add the stock, reserved garlic and  put back on the heat. Simmer for 10-15 minutes more.

As soon as the soup is off the heat, gently break eggs into the liquid to poach the eggs. Tast and adjust seasoning. Gently transfer into 4 bowls, each with one egg. Sprinkle parsley on top and serve.

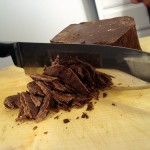
Chocolate Really Should Be Its Own Category on the Food Pyramid

I mean I read article after article about the health benefits of the dark cocoa beans all the time. Chocolate really should be given its own designation on the pyramid. Not only is it delicious, it’s good for us, too. You just can’t beat that. I read somewhere the chemicals in chocolate mimic the hormones our brains put out when we are in love. Might explain a few things. Like why chocolate is simply irresistible at certain times in one’s life.

By: H. C.

Regardless, chocolate is usually associated with sweet things. Desserts and the like. I’m gonna give you a savory recipe, Beef & Bean Chocolate Chili, along with the expected Dark Chocolate Mousse recipe. I’m rounding it all out with my chocolate martini recipe. So if you make all three recipes, it will be filled with love. 😉

Here’s my caveat… buy good chocolate. Mostly, if you can pronounce the name, don’t get it. It’s not what you want. I like Guittard, Callebaut and Scharffenberger. But Ghirardelli will do in a pinch. I’m not a chocolate snob. Really. It’s just that the mousse recipe below is the simplest it can be. As a result, each ingredients flavors come through quite strongly. Bad chocolate equals inferior flavor. That’s all.

Beef & Bean Chocolate Chili

Ingredients:
½ lb. dried pinto beans, soaked overnight with a bay leaf and drained
1 bay leaf
2 dried chipotle chiles, stemmed and seeded
1 dried ancho chile, stemmed and seeded
1 tbsp. unsweetened cocoa powder
2 tsp. dried oregano
2 tsp. ground cumin
1 tsp. paprika
½ tsp. ground cinnamon
1 lb. boneless beef chuck, trimmed and cut into 1″ cubes
Kosher salt and freshly ground black pepper, to taste
¼ cup olive oil
4 cloves garlic, chopped
2 large white onions, chopped
1 6-oz. can tomato paste
1 15-oz. can crushed tomatoes
12 oz. chocolate stout beer
1 ½ tbsp. brown sugar
2 ½ cups chicken stock
2 oz. semisweet chocolate, finely chopped
2 tbsp. lime juice
Sour cream and roughly chopped cilantro, to garnish

Instructions:
1. Put beans and bay leaf into a large pot (use at least a 6 qt pot so it can be reused) and cover with 3″ water; bring to a boil. Reduce heat to medium-low; cook, covered, and stirring occasionally, until beans are tender, 60-90 minutes. Drain beans, discarding bay leaf; set aside.

2. Heat pot over medium-high heat. Add chiles, and cook, turning once, until toasted, about 5 minutes. Transfer to a bowl and cover with 2 cups boiling water; let sit 20 minutes. Drain chiles, reserving ½ cup soaking liquid; transfer chiles and liquid to a blender with cocoa, oregano, cumin, paprika, and cinnamon and puree until smooth. Set sauce aside.

3. Add oil to pot and return to medium-high heat. Season beef with salt and pepper and, working in batches, add beef to pan; cook, stirring occasionally, until browned on all sides, 4–6 minutes. — this is where your suppose to remove the beef to cook the other ingredients. I don’t. You can. If you do remove the beef continue following instructions exactly. If you don’t, just add the following ingredients with the beef int he pot.– Using a slotted spoon, transfer beef to a bowl. Add garlic and onions to pan; cook, stirring occasionally, until golden, about 4 minutes. Add tomato paste; cook, stirring until slightly caramelized, about 2 minutes. Add reserved sauce, cook until slightly reduced, about 3 minutes. Return beef to pot, plus tomatoes, beer, sugar, and stock; bring to a boil. Reduce heat to medium-low; cook until beef is very tender, 1-1 ½ hours. — I stir in the beans with the rest of the ingredients. I like my beans to be falling apart.– Stir in reserved beans, along with chocolate, juice, salt, and pepper. Serve ladled into bowls with sour cream and cilantro.


Dark Chocolate Mousse

Ingredients:
4 1/2 ounces bittersweet chocolate, finely chopped
2 tablespoons (1 ounce) unsalted butter, diced
2 tablespoons espresso, hot water, brandy, Kahlua, vanilla extract or OJ
1 cup cold heavy cream
3 large eggs, separated
1 tablespoon sugar

Instructions:
1. Combine the chocolate, butter, and espresso in the top of a double boiler over hot, but not simmering, water, stirring frequently until smooth. Remove from the heat and let cool until the chocolate is just slightly warmer than body temperature. To test, dab some chocolate on your bottom lip. It should feel warm. If it is too cool, the mixture will seize when the other ingredients are added.

2. Meanwhile, whip the cream to soft peaks, then refrigerate. Once the melted chocolate has cooled slightly, whip the egg whites in a medium bowl until they are foamy and beginning to hold a shape. Sprinkle in the sugar and beat until soft peaks form.

3. When the chocolate has reached the proper temperature, stir in the yolks. Gently stir in about one-third of the whipped cream. Fold in half the whites just until incorporated, then fold in the remaining whites, and finally the remaining whipped cream.

4. Spoon or pipe the mousse into a serving bowl or individual dishes. Refrigerate for at least 8 hours. (The mousse can be refrigerated for up to a day.)


Chocolate Martini

Ingredients:
vanilla vodka- about 3 oz.
Kahlua- about 1.5 oz.
Godiva chocolate liqueur- about 2 oz
dark chocolate sauce- about 1.5 oz.  (I use Torani)
splash of cream

In a shaker, fill with ice and all ingredients. Shake. Pour. Serve.

* I line my martini glass with chocolate strips of sauce. It makes it pretty as well as tasting good as I drink my martini.*